This is Part 2 of the GMCP Loci.Menu Tutorial.
Where were we?
In
Part 1
of the tutorial, we made ourselves a menubox with some buttons in it. We did
it by putting a "menubox":{} item into the JSON file along with a
name and a label. The menubox itself contained a width, a hight, and array of
button objects. The JSON looked like this:
{
    "name": "tutorial",
    "label": "Tutorial Menu",
    "menubox": {
        "width": 3,
        "height": 2,
        "buttons": [ … ]
    }
}
The JSON code didn't look exactly like this, because this doesn't
show all of the different buttons that we put into the
"buttons":[] array. I've indicated that there is more inside that
array that I'm not showing here with a '…' mark. Those three little dots are
called 'ellipis', and they indicate a pause in speech, or an omission of words.
In this case, they mean "I think you'll rememember what goes there from
before." Don't actually replace anything with the three dots.
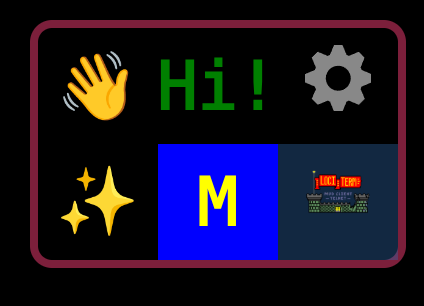
Adding to the Menubar Collection
The "Menubar" is an array of menu objects that can be called up dynamically
by an "id" when they are needed. Each menu object has an "item" array that
contains all of the buttons that make up the menu. Remember that in the last
part of the tutorial, we made a button in the menubox that opens the
"menu_mytest" menu. Now we'll define what "menu_mytest" does.
{
    "name": "tutorial",
    "label": "Tutorial Menu",
    "menubox": {
        "buttons": [
            { … },
            {
                "name": "test menu",
                "text": "M",
                "color": "yellow",
                "background": "blue",
                "menubar": "menu_mytest"
            },
            { … }
        ]
    },
    "menubar": [
        {
            "id": "menu_mytest",
            "item": [
                {
                    "label": "Hail!",
                    "send": "say Hail!\n"
                },
                {
                    "label": "Hail",
                    "open": "menu_hail"
                }
            ]
        }
    ]
}
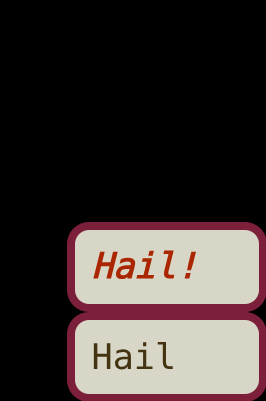
Try hitting the "M" button in the menubox, and our new "menu_mytest" should pop open somewhere one the screen. Hit the "Hail!" button, and a command will go to the game. Hit the other button and nothing will happen. We haven't defined the "menu_hail" menu yet.
There are a few things to notice a few things about this menubar. First, you don't get to define where the menu pops up. By default, LociTerm pops it in the bottom right corner of the screen, so that it is easy to hit with a thumb when using a phone, but the player can override that location. Second, just like with the menubox, you don't get to define the size of the menu buttons. The player is in charge of that. Third, the menu buttons are automatically styled, so that the player can tell what hitting the menu button should do. See how the "Hail!" button in the screenshot is italicized and is shown in a different color than the other "Hail" button? Buttons that use the "send" action automatically get a different style than buttons that use the "open" action.
Menu Items
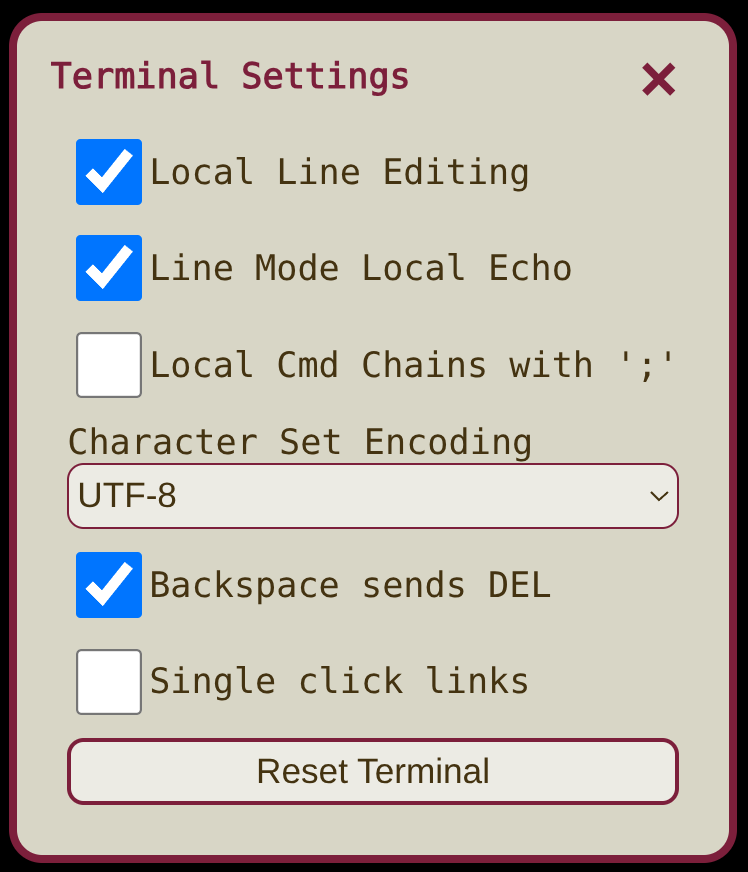
Menu items have attributes that that control what they do when activated. Menu items are meant to route text to the game, and then optionally open a new menu or the onscreen keyboard. How the text is routed depends on whether the player has "Local Line Editing" turned on or off. If it is on, then text goes through the line editor first. If it is off, text goes directly to the game. The Local Line Editing feature is also controlled by the game server. Games that don't have full Telnet support for character at a time mode will have a Local Line Editing mode enabled by default. (Check out "Echo and SGA Telnet Options for MUDs" for more information on Telnet default line mode and character modes.)
The "Send" and "Prompt" Attributes
The "send" and "prompt" attributes route text to the game. The two attributes differ in how they are automatically styled, and in where the focus goes after selecting the item. With the "prompt" attribute, the focus shifts back to the CLI and opens the keyboard for entry. With "send", the focus is unchanged, so that more menu items or buttons can be used. In general, unless you are 100% certain that you want to force the onscreen keyboard to pop open, you probably want to use the "send" attribute and avoid using "prompt".
The "send" action is intended for commands that end with a \n
newline and are sent to the game immediately, or for commands that are built up
piecemeal from the selection menus that can be activated by an additional
"open" attribute in the item. The "send" command does not automatically
return focus to the keyboard.
The "prompt" action is intended for partial commands that end with a space (not a newline), and that the player is meant to complete by typing out the rest of the command. The "prompt" action routes the text, then automatically sets focus on the keyboard for the player, saving them a 'click' to get back to the line editor.
Let's change "menu_mytest" to show the difference between "send" and
"prompt". We'll change the items to look like this:
{
    "id": "menu_mytest",
    "item": [
        {
            "send": "say Hail!\n"
        },
        {
            "prompt": "say Hail "
        },
        {
            "label": "Hail",
            "open": "menu_hail"
        }
    ]
}
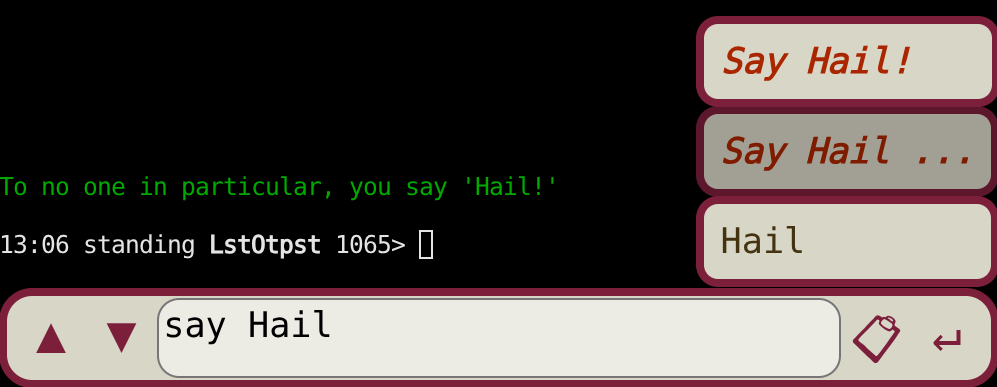
Notice that we've taken out the "label" attribute in the first two items to show how the button text is automatically styled. Styling may look different in other clients, but in this version of LociTerm, buttons that will route text show up in a red italic font, and buttons with the "prompt" action automatically get an '…' appended to the end. The "open" item is shown in a darker, normal font. It is ok to skip the "label" on "send" and "prompt" menu items, as long as the text isn't very long. The "label" is always required for "open" elements.
Hit the "M" button in the menubox to pop open our test menu, then try hitting the "Say Hail!" send item. You'll see, as in the screen shot, that the command text is sent to the game immediately. Now try out the "Say Hail ..." prompt item. The text will be inserted into the local CLI line editor, and the editor gets focus. In both cases, as soon as the command is sent to the game, it goes into the CLI's history buffer, and can be repeated later with the "▲","▼", and "↵" buttons. The "📋︎" button is for opening the wordstack, a special cut-and-paste buffer, and we'll get to that one soon.
Of course, the "Hail" item that opens "menu_hail" doesn't do anything at all, because we have not defined that menu yet. Let's fix that next.
The "Open" Attribute
The "open" attribute opens a sub-menu when the item is selected, and can be
combined with a "send" attribute to route a command to the game at the same
time. We've got an "open" attribute for the menu "menu_hail" in our example
already, so lets make a new menubar definition to let the player choose from
different ways to hail someone. New menus get listed as an element of the
"menubar":[] definition.
What else is on the menu today?
There are a few other attributes that can be usd for opening system menus, and for sending programmable hotkey combinations, but for now, this is where the tutorial ends, and your experimentation begins!
Check out the LociMenu Docs on GitHub for more detailed information!